Showing posts with label cupcakes. Show all posts

Saturday, April 13, 2013

Reese's Peanut Butter Cup......Cake!!!

Hello all!

I have a ton of homework this weekend.
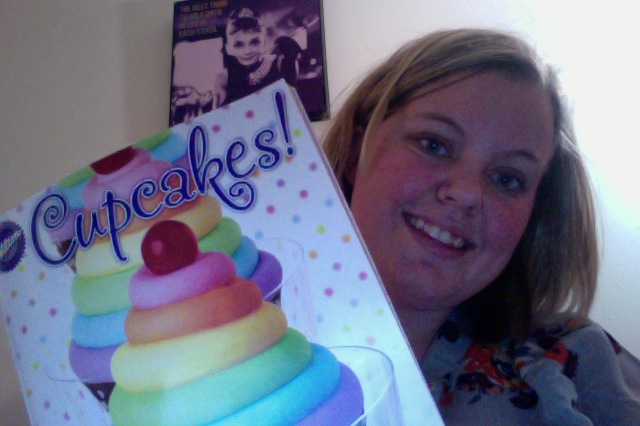
But I also have baking supplies.
Which do you think won?

Anyway, this week I've been on a 'forget the diet, I want chocolate' kick.
It ended up carrying over into my cupcakes for the week.
I had so much fun making filled cupcakes for Easter that I'm at it again.

This week, I made a chocolate cupcake with a peanut butter filling, and chocolate frosting.


Here's what you need:

Reese's Cupcakes with Peanut Butter Filling and Chocolate Frosting

Oven Temp: 350°
Prep Time: 30 minutes
Bake Time: 15-17 minutes
Total Time: ~ 1-1.5 hours

Ingredients:

Cupcake:

  • Betty Crocker Milk Chocolate Cake Mix
  • 1/3 c. oil
  • 1 1/4 c. Water
  • 3 Eggs
  • Cupcake Corer (or a knife)
  • Cupcake liners
Filling:
  • 1 Jar Creamy Peanut Butter
  • 13 oz Jar of Marshmallow Fluff
  • Pastry Bag
Garnish/Frosting
  • Sea Salt
  • Chopped Peanuts
  • 1 can Betty Crocker Whipped Milk Chocolate Frosting
Prepare the cake mix per the directions on the box. Bake until a toothpick comes out clean.
Wait until they are completely cooled to core them.

While you are waiting, make your filling by taking equal parts (no specific measurements here... I made it up as I went along) of peanut butter and marshmallow fluff and mixing them in a bowl. There's no wrong way to do this part. Just make sure that the peanut butter flavor doesn't get masked by the marshmallow. 

*** a while later***

Core your cupcakes, or cut out a hole with a knife.
Put your filling into a pastry bag, (no tip needed) and fill the cores of the cupcakes. Smooth the top a little bit so that the frosting will sit nicely.

The Cupcakes all ready for delivery!
Now frost the cupcakes. (I used a pastry bag) Sprinkle A LITTLE 
sea salt on top of the frosting, and finish with the chopped peanuts.

There you go!!!

Bonus Story: 

I can't take these into work, because of allergies. So I decided I'm going to deliver them to friends and family around town... I can't wait!! :D


Wednesday, April 10, 2013

What was supposed to be an Easter post turned into an early April post. :)

So I've been pretty upfront about being a master procrastinator. I successfully procrastinated, and baked cupcakes last week  two weeks ago, like I always do. But, I completely forgot to post them.... Whoops...

To be honest, my professional procrastination has caught up to me, and school has taken precedence. :/

BUT! I will bake cupcakes this weekend, if it means using a textbook as a place to rest my batter-covered spatula.

Anyway....

My family had a get together for Easter, and I got put in charge of baking cupcakes.
I wanted to do something fresh, fun, and not 'Easter-y.'


My (awesome) roommate got me this Wilton cupcake book to further expand my knowledge, so I decided it was only fitting to choose my recipe from there. :)

As per usual, I couldn't just follow the recipe. I made my own little tweaks to make what I thought would be a great cupcake.


Fruit Tart Cupcakes 


Oven Temp: 350°
Prep Time: 30 minutes
Bake Time: 18-20 minutes
Total Time: ~ 1.5 Hours

Cupcake Ingredients:

  • 1 Box Betty Crocker French Vanilla Cake Mix
  • Eggs, Water & Oil to prepare mix
  • Cupcake Liners
  • Cupcake Pan
Pastry Cream Ingredients:
  • 6 T granulated sugar
  • 1/4 c. flour
  • 1/2 tsp salt
  • 1 c. milk
  • 4 Egg Yolks
  • 1 tsp. Vanilla Extract
  • 2 T. unsalted butter.
  • Pastry Bag
Topping Ingredients:
  • Strawberries, sliced
  • Blueberries
  • Kiwi, sliced & peeled
  • Whip Cream
  • Pastry bag


Additional Items Needed:

Cupcake Corer: 
This was an impulse buy at Walmart. I don't think it was more than a couple bucks.
It is perfect for a filled cupcake like this. Otherwise, you can just cut a hole with a knife.


Anyway... on to the baking...

Cupcakes:

Prepare the cake mix according to the box. Bake until a toothpick comes out clean, and let cool completely.

Once the cupcakes are cooled, you can cut your holes out for your filling.

Pastry Cream:

In a small saucepan, combine sugar, flour, and salt. Whisk in egg yolks and milk until combined. Cook over medium heat, stirring constantly with a spoon until mixture is thickened. Remove from heat and stir in vanilla and butter.

Pour mixture into a bowl, and press plastic wrap down onto the surface of the pastry cream to prevent it from forming a skin.
Place in fridge until chilled, or ready to use.

Toppings: 
Slice strawberries & kiwis. Keep refrigerated until used.

Assembly:

Using a pastry bag, fill the 'holes' in your cupcakes, plus a little extra. Spread the 'extra' around on the top of the cupcake, making sure it is even.

Place a kiwi slice on each cupcake. Then, with a pastry bag, put a little bit of whip cream on top of the kiwi. Then arrange the strawberries and blueberries as you like.
Keep refrigerated until ready to serve.

There you have it!

Again, I apologize for the very late post, and will be back at the baking this weekend!


Sunday, March 17, 2013

An Experimental Birthday Gift :)

So, fun fact, I have a roommate.
She has put up with my obsession with baking cupcakes, and she even eats them too.
Her birthday was last Monday, but since she was in California, I decided to bake up a surprise for her to come home to.

I know that she likes 2 things for sure: Rainbows & Cupcakes.
So why not make a rainbow pull-apart cake?


Anywho, Here's what you need.


The Finished Product. :)
Rainbow Pull-Apart Cake

Oven Temp: 350°
Prep Time: ~45 minutes
Bake Time: 15 minutes per pan
Total Time: ~ 1.5 hours


Cake Ingredients

*Note* I didn't want to use Funfetti cake mix, because I wanted to control the amount of sprinkles I had.  Feel free to use Funfetti, because honestly, it is easier.


  • 1 Box Betty Crocker Vanilla Cake Mix
  • 1 Bottle of Sprinkles
  • McCormick's Neon Food Coloring
  • Toothpicks
  • Cupcake Liners
  • Cupcake Pan
  • 1 C. Water
  • 1/3 C. Oil
  • 3 Eggs

Frosting Ingredients

*Note* I used a combination of Kool-Aid and food coloring to color my frosting. If you don't want flavors, food coloring does just fine. :)

  • 3 cans Vanilla Frosting
  • 5 packets of Kool-Aid
    • Strawberry
    • Peach-Mango
    • Lemonade
    • Lemon-Lime
    • Tropical Punch
    • (I left purple as plain frosting.)
  • Plastic Baggies
  • Plastic Spoons (if you don't want to wash a ton of spoons)
  • Shredded Coconut
The unbaked cupcakes
Ok. So, the cake is pretty simple. Mix the water, oil and eggs, then add the cake mix. Combine until moistened. Then add the sprinkles, and combine well. Scoop into cupcake pan, filling only 2/3 full. Put a few drops of food coloring in each cupcake, and swirl around with a toothpick. 
Bake until a toothpick stuck in the middle comes out clean, and cool completely before frosting.

For the frosting, separate 2 of the cans of frosting into 6 separate containers. (I used styrofoam cups)
Each cup represents a different cup/flavor. So, if you're doing flavors, add 1/2 tsp. of Kool- Aid to each respective cup. Combine well. Then, use food coloring to adjust the coloring to your liking. There's not really a science to it, except for normal color mixing rules (red+yellow = orange... etc.) Then put each colored frosting in a separate sandwich bag, (unless you have 7 pastry bags, and want to wash them all.)

Fast forward until the cupcakes are cooled...

Arrange the cupcakes in a rainbow- like shape. If you need to transport it, I recommend a piece of cardboard wrapped in tin foil. If you don't need to move it, a layer of tin foil on your counter does just fine.  This is what I did for the shape:


Once you have the cupcakes arranged, take the other can of frosting, and do a 'base coat' to glue all of the cupcakes together. Make sure that the cupcakes are covered evenly, and that there are no holes between any of the cupcakes.

Then, starting with the red frosting, cut a small piece off of the corner of the bag. Frost the red onto the cake, and then continue with the other colors.

Once this is done, add coconut to the cloud area to give it some texture, and there you go!